When tabbing between Controls on Forms and they contain text all the data within the Control is selected. This can be problematic as Users may inadvertently overwrite what is already there and not even realize it as they begin typing. To avoid that you can force the Cursor to land at the beginning or the end of the Control by using one of the below Sub’s. For example, for Controls where the Date is entered I prefer to have the User start at the beginning, however, if entering notes I put the Cursor at the end of the Control.
To put the Cursor at the beginning…
Sub sMoveCursorToStart()
On Error GoTo ClearIt
'Moves the cursor to the START of text in the control

     Dim ctl As Control
     Set ctl = Screen.ActiveControl

     If IsNull(ctl) Then Exit Sub
        ctl.SelStart = 0
     Exit Sub

ClearIt:
     Err.Clear
End Sub
To use place the below in the On_Enter of the Control…
Sub sMoveCursorToEnd()
On Error GoTo ClearIt
'Moves the cursor to the END of text in the control

     Dim ctl As Control
     Set ctl = Screen.ActiveControl

     If IsNull(ctl) Then Exit Sub
        ctl.SelStart = Len(ctl.Text)
     Exit Sub

ClearIt:
     Err.Clear
End Sub
To use place the below in the On_Enter of the Control…
This topic comes up from time to time in Forums and the answer usually involves a Temp Table or adding blank records or digging up that Microsoft® Report Utilities, How to Print a Constant Number of Lines per Group, sample which involved adding the controls you wanted to *hide* to the Function. I thought why not make something a little more flexible and without the need for Temp Tables, adding a bunch of blank records or adjusting the code each time. To read more click here.
Interesting question in a Forum whereby the Poster wanted a list of the Quarters between two dates. While this request doesn’t come up often when it does there’s an answer…
While you *think* you could run this in one query it’s just not possible because in order for the query to provide the answer it needs data as in dates to process. Other than that you are just going to get the beginning Quarter and the ending Quarter. The query cannot *think* those dates into existence. So, we have to *trick* it into seeing those dates. (You could use this same procedure for projecting months or years, as well.)
Step 1
In your database create a table named tblCount and add one field named dNumber – Long Integer and make it a Primary Key. Start with the number 0(zero) and continue adding until you get to 1724. (Okay, tedious but worth it so just keep lugging away till you get to that number.)
Side note: A way faster way to get those values in a table is inside a transaction with a QueryDef (posted by MarkK in Access World Forums) Just copy\paste the below code in a new Module and then put…
?fInsertNumbers()
…in the Immediate window and press enter.
Option Compare Database
Option Explicit
Const SQL As String = "INSERT INTO tblCount(dNumber) VALUES( p0 )"
Function fInsertNumbers()
'From https://www.access-programmers.co.uk/forums/showthread.php?t=300693

    Dim i As Integer

    DBEngine.BeginTrans
    With CurrentDb.CreateQueryDef("", SQL)
        For i = 1 To 1724
            .Parameters(0) = i
            .Execute
        Next
        .Close
    End With
    DBEngine.CommitTrans

End Function
Tip! If you download the sample file below tblCount is included and already populated and Module is included for future use.
Step 2
Create a SELECT query (mine is named qryGetProjectDays) based off of the Table that has the Project Start Date and End Date and drop tblCount in and do NOTcreate any Joins. You need one field…
TheDays: DateAdd("d",[dNumber],[pStartDate])
and add <=[pEndDate] to the Criteria section of that one field (example of what you should have below)…
SELECT DateAdd("d",[dNumber],[pStartDate]) AS TheDays
FROM tblYourTable, tblCount
WHERE (((DateAdd("d",[dNumber],[pStartDate]))<=[pEndDate]))
ORDER BY DateAdd("d",[dNumber],[pStartDate]);
Note: When you preview the query provided you have entered a Start Date and and End Date you will see a record for every day in the Project.
Step 3
Create a new SELECT query and place qryGetProjectDays (or whatever you named your query) in your new SELECT query. Place…
CDate(Format([TheDays],"q-yyyy"))
…on the Field line below (example below). You should now see all the Quarters between two dates entered.
SELECT CDate(Format([TheDays],"q-yyyy")) AS ProjectQuarters
FROM qryGetProjectDays
GROUP BY CDate(Format([TheDays],"q-yyyy"));
All done! You can download the sample database here.
When I’m designing a database I usually start off with one of my Templates. But, as with any Template, the Tables therein do not always fit exactly with the Client’s needs. And, since I like to document changes I built this tool…
In a nutshell…
After the Template database is created I import the Objects from the Tables and File List database. From there I can go to Design Mode of the Table, the little blue button, and make my changes, as well as, mark what changes I’ve made in the *Comments* column. Then I have a record of my changes and, just in case someone needs a hard copy, output the results to Excel (template included).
To use…
Download the Table and File List zipped file and unzip the contents to a Folder, not your Desktop. Then open the database you want to run this on and import the Objects into your database and place TableFieldList.xlsx into the same Folder as the database you want to use this in. Open frmTableFileList and click the Redo Command Button.
The blue button to the left opens the Table in Design Mode. (Thanks to Tony Toews’ database for giving me the idea to go directly to Design Mode from here instead to dealing with the Navigation Pane.)
I use the Check Box to indicate I cam done. Once checked the record (row) will turn light grey (helps me stay focused).
Blue boxes at the top are for filtering. Once making a selection and/or entering text, partial entries accepted, select the Filter button at the top, to clear select the Clear Filter button.
The code (in case your interested)…
Pretty standard except that it loops thru the Tables in MSysObjects so it does not require the individual input of each Table run. Nor do you need to create tblTableFieldList before running as it will look to see if it’s there. (One caveat, I did not adjust the Form to run without the query which needs the Table, never got around to it. So, if you attempt to open the Form before creating the Table you will get a message. However, in the sample provided there is a Table so no worries there.)
Function fncTableFieldList()
'7.15.2016 Gina Whipp (Access Diva)
'Purpose:  Write all table and field names to tblTableFieldList

    Dim lngTable As Long
    Dim lngField As Long
    Dim db As DAO.Database
    Dim rs As DAO.Recordset
    Dim tdf As DAO.TableDef
    Dim lngRow As Long
    Dim fld As DAO.Field
    Dim strTable As String

        Set db = CurrentDb

        strTable = "tblTableFieldList"

        If DCount("*", "MSysObjects", "Type = 1 AND Name='" & strTable & "'") = 0 Then
            'Create tblTableFieldList
            Set tdf = db.CreateTableDef("tblTableFieldList")

        With tdf
           'Autonumber
           Set fld = .CreateField("tflID", dbLong)
           fld.Attributes = dbAutoIncrField + dbFixedField
              .Fields.Append fld

              .Fields.Append .CreateField("tflTableName", dbText, 50)
              .Fields.Append .CreateField("tflFieldName", dbText, 50)
              .Fields.Append .CreateField("tflDataTypeID", dbLong)
              .Fields.Append .CreateField("tflSize", dbLong)
              .Fields.Append .CreateField("tflAttributeID", dbLong)
              .Fields.Append .CreateField("tflComment", dbText, 255)
              .Fields.Append .CreateField("tflExclude", dbBoolean)
        End With
            'Append new output table definition to database
            db.TableDefs.Append tdf
            Set fld = Nothing
            Set tdf = Nothing
            'Debug.Print "tblTableFieldList created."
            Application.RefreshDatabaseWindow
        Else
            'Empty tblTableFieldList
            strSQL = "DELETE tblTableFieldList.* FROM tblTableFieldList"
                      CurrentDb.Execute strSQL, dbFailOnError
            'Debug.Print "tblTableFieldList emptied."
        End If

        Set rs = db.OpenRecordset("tblTableFieldList", dbOpenDynaset)
    'Set on error in case there is no tables
    On Error Resume Next

    'Loop through all tables
    For lngTable = 0 To db.TableDefs.Count
        'Ignore temporary (~) and system tables (MSys)
        If Left(db.TableDefs(lngTable).Name, 1) = "~" Or _
            Left(db.TableDefs(lngTable).Name, 4) = "MSys" Then
        Else
            'Otherwise, loop through each table and get Primary Key
            For lngField = 0 To db.TableDefs(lngTable).Fields.Count - 1
            'Use this if you don't want Primary Key
            'For lngField = 1 To db.TableDefs(lngTable).Fields.Count - 1
                lngRow = lngRow + 1
                    rs.AddNew
                    rs!tflTableName = db.TableDefs(lngTable).Name
                    rs!tflFieldName = db.TableDefs(lngTable).Fields(lngField).Name
                    rs!tflDataTypeID = db.TableDefs(lngTable).Fields(lngField).Type
                    rs!tflSize = db.TableDefs(lngTable).Fields(lngField).Size
                    rs!tflAttributeID = db.TableDefs(lngTable).Fields(lngField).Attributes
                    rs.Update
            Next lngField
        End If
    Next lngTable
    'Resume error breaks
    On Error GoTo 0

    'Release from memory
    Set rs = Nothing
    Set db = Nothing

End Function
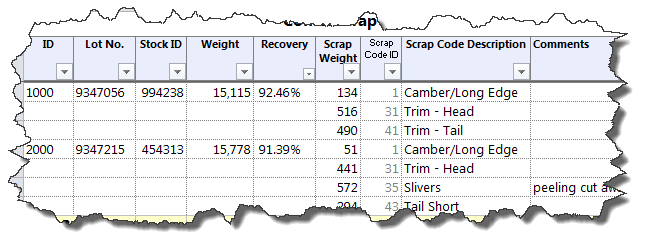
Last year when I was really starting to jump into exporting data to Excel I ran into an issue. I wanted the rows with duplicated data to only show the first row and hide the following rows… Conditional Formatting, right? So, why couldn’t I get what I wanted. When all else fails *Google* it! Which is just what I did and found exactly what I needed on Contextures Blog then just convert the Excel Macro into VBA and this…
     Const xlUp As Long = -4162 'This can go at the very tip under the Declarations
     Dim ApXL As Object
     Dim xlWBk As Object
     Dim xlWSh As Object
     Dim lngLastRow As Long
     Dim Z As String

With xlWSh
     'Conditional Formatting
     lngLastRow = xlWSh.Cells(.Rows.Count, 1).End(xlUp).Row
     Z = "A4" & ":F" & lngLastRow

     xlWSh.Range(Z).Select
     '.Add Type:xlExpression use 1 for Early Binding, 2 for Late Binding
     ApXL.Selection.FormatConditions.Add Type:=2, Formula1:="=A3=A2"
     ApXL.Selection.FormatConditions(ApXL.Selection.FormatConditions.Count).SetFirstPriority
          With ApXL.Selection.FormatConditions(1).Font
               .Color = RGB(255, 255, 255)
               .TintAndShade = 0
          End With
     ApXL.Selection.FormatConditions(1).StopIfTrue = False
End With
…produces this…
Note, the code includes some caveats… I never knew how many rows hence *Z* and *lngLastRow* and since I have a Totals row I needed to know for highlighting and summing. If you don’t have that limitation you can use (change the column and row numbers accordingly)…

 Access MVP (2010-2015)
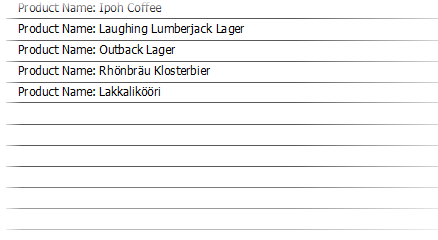

")
")
Recent Comments
No comments.